
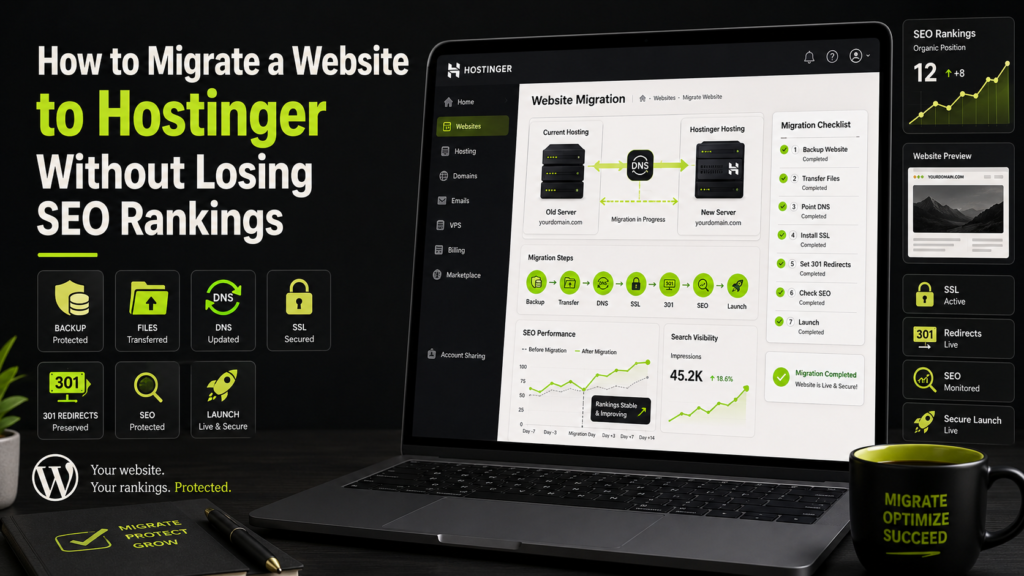
Migrate Website to Hostinger carefully if your website already gets traffic from Google.
A migration is not just moving files from one host to another. It can affect speed, SSL, DNS, URLs, redirects, email, backups, tracking, and search visibility.
In 2026, affordable Hostinger web hosting matters because many website owners want better speed, cleaner tools, SSL, backups, email, and WordPress support without paying high hosting costs.
However, moving too fast can create SEO problems. A broken redirect, missing page, failed SSL setup, or long downtime can hurt users and search engines.
The good news is that you can migrate safely with the right checklist.
This guide explains how to move your website to Hostinger without losing SEO rankings, which plan to choose, what to check before migration, and what to monitor after launch.
To review current hosting options, check Hostinger pricing.
Migrate Website to Hostinger: Quick SEO-Safe Plan
Migrate Website to Hostinger with a plan, not guesswork.
The safest method is to back up your website, choose the right Hostinger plan, request migration through hPanel, test the migrated site, update DNS carefully, confirm SSL, check redirects, and monitor Google Search Console.
Hostinger offers free website migration, which is useful for beginners who do not want to manually move files and databases.
Still, you should not depend only on the migration request. You should also protect your SEO basics.
- Before migration: take backups, crawl URLs, export redirects, and record rankings.
- During migration: keep the old site live, submit the migration request, and test the copy.
- After migration: check SSL, DNS, redirects, speed, forms, analytics, and Search Console.
If you want a beginner-friendly hosting move, explore Hostinger deals.
Why Website Migration Can Affect SEO
Search engines care about access, speed, structure, and trust.
If your website disappears for hours, shows errors, loses pages, changes URLs, or breaks HTTPS, Google may struggle to crawl it correctly.
Even users can lose trust if they see broken pages or security warnings.
Common SEO Migration Risks
- Downtime during DNS changes
- Missing website files or database tables
- Broken internal links
- Lost images or media files
- HTTP pages replacing HTTPS pages
- Missing 301 redirects
- Incorrect canonical tags
- Blocked pages in robots.txt
- Lost analytics or tracking code
- Slower performance after migration
These issues are avoidable if you prepare well and test everything before pointing traffic to the new hosting account.
To choose a safer hosting base, compare Hostinger hosting plans.
Step 1: Choose the Right Hostinger Plan Before Migration
Do not migrate your site to a plan that is too small.
If your current website already has traffic, images, plugins, forms, WooCommerce, or heavy content, plan resources matter.
| Plan | Best For Migration | Key Limits and Features | SEO-Safe Buying Advice |
|---|---|---|---|
| Premium Web Hosting | Small blogs, portfolios, simple websites | 3 websites, 1 CPU core, 2 GB RAM, 20 GB storage, 400,000 inodes, weekly backups | Use only for lighter websites |
| Business Web Hosting | Small business sites, WordPress blogs, content sites, starter stores | 50 websites, 2 CPU cores, 3 GB RAM, 50 GB storage, 600,000 inodes, daily backups, CDN | Best value for most SEO websites |
| Cloud Startup | High-traffic sites, WooCommerce, agencies, heavier WordPress websites | More resources, dedicated IP, priority support, CDN, daily backups, stronger headroom | Choose when traffic or revenue matters |
For most active WordPress websites, Business is the safer web hosting choice because it gives more resources, CDN, and daily backups.
To compare current offers, check Hostinger Web Hosting options.
Step 2: Back Up Your Website Before Moving
Never start a migration without a full backup.
You need a copy of your website files, database, uploads, themes, plugins, redirects, and important settings.
Backup Checklist
- Download website files.
- Export the database.
- Save WordPress uploads.
- Export redirects.
- Save DNS records.
- Record current SSL status.
- Export important plugin settings.
- Take screenshots of key pages.
If anything goes wrong, a backup lets you restore the site instead of rebuilding from memory.
Step 3: Create an SEO Baseline
Before migration, record your current SEO performance.
This helps you compare the site before and after moving. It also helps you detect issues quickly.
Record These SEO Details
- Top organic pages
- Main keyword rankings
- Important landing pages
- Current sitemap URL
- Indexed pages in Google Search Console
- Existing 404 errors
- Core Web Vitals data
- Organic traffic from analytics
- Backlink landing pages
Do not skip this step if your website already earns traffic, leads, or sales.
For a better migration foundation, view current Hostinger discount.
Step 4: Request Free Migration Through Hostinger hPanel
Hostinger allows website migration requests through hPanel.
For WordPress, Hostinger’s process is beginner-friendly. You can go to the migration area, add a migration request, choose WordPress, fill in the required fields, and submit the request.
Basic Hostinger Migration Flow
- Buy a suitable Hostinger hosting plan.
- Log in to hPanel.
- Go to the migration area.
- Choose to migrate a website.
- Select your website type, such as WordPress.
- Enter the required website details.
- Submit the migration request.
- Wait for the migration to complete.
Hostinger says its team can migrate your site while the old site stays live. Still, keep your old hosting active until you finish final checks.
To begin the move, start your website migration.
Step 5: Test the Migrated Website Before Changing DNS
This is where many website owners make mistakes.
They update nameservers too early, then discover missing images, broken pages, plugin errors, or SSL issues after traffic has already moved.
Test first. Switch later.
Pre-DNS Testing Checklist
- Open the homepage.
- Check top SEO pages.
- Test blog posts and categories.
- Check contact forms.
- Test WooCommerce cart and checkout if used.
- Open images and media files.
- Check menus and footer links.
- Log in to WordPress admin.
- Check plugin settings.
- Review mobile layout.
If something looks wrong, fix it before sending visitors to the new hosting account.
Step 6: Update DNS Carefully
DNS tells browsers where your website is hosted.
When you migrate to Hostinger, you may need to update nameservers or DNS records depending on your domain setup.
DNS propagation can take time. During this period, some visitors may see the old host while others see the new host.
DNS Migration Tips
- Keep the old hosting active during propagation.
- Do not delete the old site immediately.
- Update DNS during a low-traffic period.
- Check A records and nameservers carefully.
- Keep email DNS records safe.
- Confirm the website loads from different networks.
If your domain email is hosted separately, be extra careful with MX records. Wrong email DNS settings can stop business emails from working.
For a smoother hosting move, compare Hostinger migration options.
Step 7: Confirm SSL and HTTPS
After migration, check SSL immediately.
Your website should load securely with HTTPS. If browsers show “Not Secure” warnings, users may leave, and SEO signals can suffer.
SSL Checks After Migration
- Open the homepage with HTTPS.
- Check important landing pages.
- Look for mixed content warnings.
- Confirm images load over HTTPS.
- Check contact forms and checkout pages.
- Confirm HTTP redirects to HTTPS.
Hostinger includes SSL with its hosting plans, which helps simplify this step for beginners.
Step 8: Protect URLs, Redirects, and Canonicals
SEO rankings often depend on stable URLs.
If your migration changes URLs, removes redirects, or breaks canonicals, Google may treat pages differently.
For the safest SEO migration, keep the same URL structure unless you are doing a planned redesign or site architecture change.
URL and Redirect Checklist
- Keep the same permalinks.
- Keep important page URLs unchanged.
- Import existing 301 redirects.
- Check canonical tags.
- Fix broken internal links.
- Check image URLs.
- Review sitemap URLs.
- Do not block important pages in robots.txt.
If URLs must change, create 301 redirects from old URLs to the most relevant new URLs.
Step 9: Check Speed and Core Web Vitals
A migration can improve or reduce speed depending on your hosting plan and website setup.
After moving to Hostinger, test your most important pages.
Speed Checks to Run
- Homepage speed
- Top blog post speed
- Service page speed
- Product page speed
- Checkout page speed
- Mobile speed
- Image optimization
- Caching behavior
Business is usually better than Premium for active sites because CDN and daily backups add practical value. Cloud is better when your site needs more resources.
For faster hosting features, compare Hostinger Business plan.
Step 10: Monitor Google Search Console After Migration
Do not disappear after migration.
For the next few days and weeks, monitor your website closely.
Post-Migration SEO Checks
- Submit your sitemap again.
- Check indexing status.
- Watch crawl errors.
- Monitor 404 pages.
- Check HTTPS report.
- Review Core Web Vitals.
- Compare rankings and traffic.
- Check analytics tracking.
- Review contact form submissions.
Small ranking movement can happen after technical changes. However, major traffic drops usually point to broken URLs, indexing issues, downtime, or tracking problems.
Hostinger vs Alternatives for Website Migration
Hostinger is not the only provider that supports website migration.
Bluehost, SiteGround, GoDaddy, and Namecheap are also common options. The best choice depends on your budget, website type, support needs, and technical comfort.
| Provider | Best For | Migration Strength | Possible Limitation |
|---|---|---|---|
| Hostinger | Beginners, WordPress users, small businesses, bloggers | Free website migration, hPanel request flow, SSL, backups, affordable plans | Plan resources should match website size |
| SiteGround | Higher-budget WordPress users | Migration plugin and managed WordPress tools | Usually more expensive after renewal |
| Bluehost | WordPress beginners | Beginner-friendly WordPress setup | Add-ons and renewal pricing need review |
| GoDaddy | Domain-first users | Large domain ecosystem and broad hosting products | Checkout add-ons should be checked carefully |
| Namecheap | Simple low-cost websites | Affordable domains and starter hosting | May feel less guided for some beginners |
Hostinger is strongest when you want affordable web hosting, free migration, SSL, backups, WordPress tools, and a simple dashboard.
To compare current offers, view current Hostinger deal.
Pros and Cons of Migrating to Hostinger
Pros
- Free website migration available
- Beginner-friendly hPanel dashboard
- Good fit for WordPress websites
- Free SSL included with hosting plans
- Weekly backups on Premium
- Daily and on-demand backups on Business
- CDN included on Business and Cloud plans
- Affordable web hosting pricing
- Clear upgrade path to Cloud
- Useful for blogs, small businesses, portfolios, and stores
Cons
- DNS propagation can take time.
- SEO checks are still your responsibility.
- Premium may be limited for active websites.
- Dedicated IP is mainly included with Cloud plans.
- Priority expert support is mainly tied to Cloud plans.
- Incorrect redirects or missing files can still harm SEO.
Before migrating, check Hostinger Business Hosting.
Final Recommendation: Can You Migrate to Hostinger Without Losing SEO?
Yes, you can migrate a website to Hostinger without losing SEO rankings if you prepare properly.
The key is to keep the old website live, back up everything, preserve URLs, test the migrated copy, update DNS carefully, confirm SSL, check redirects, and monitor Search Console after launch.
Premium is fine for simple websites. Business is better for most active SEO websites because it includes stronger limits, CDN, and daily backups.
Cloud is the better upgrade when your website gets more traffic, uses WooCommerce, needs dedicated IP, or supports business-critical revenue.
If your website already ranks, treat migration like a technical SEO project, not just a hosting switch.
Ready to move your website safely? migrate your website to Hostinger today.
FAQs About Migrating a Website to Hostinger
Can I migrate a website to Hostinger without losing SEO rankings?
Yes. You can migrate safely if you keep URLs the same, avoid long downtime, preserve redirects, check SSL, test the migrated site, and monitor Google Search Console.
Does Hostinger offer free website migration?
Yes. Hostinger offers free website migration, and users can submit migration requests through hPanel for WordPress and other website types.
How do I request website migration in Hostinger?
After buying hosting, log in to hPanel, go to the migration area, choose the website type, fill in the required details, and submit the migration request.
Should I cancel my old hosting after migration?
No. Keep your old hosting active until DNS propagation finishes and you confirm that the new site works correctly on Hostinger.
How long does DNS propagation take?
DNS propagation can take several hours and sometimes up to 24–48 hours depending on the record, provider, and network.
Which Hostinger plan is best for website migration?
Premium is fine for small websites. Business is better for most active WordPress, SEO, and small business websites. Cloud is better for high-traffic or business-critical sites.
Will changing hosting change my Google rankings?
Changing hosting alone does not have to hurt rankings. Problems usually happen when migration causes downtime, broken pages, SSL errors, slow speed, or missing redirects.
Should I keep the same URLs during migration?
Yes. Keeping the same URLs is the safest option unless you are doing a planned site restructure with proper 301 redirects.
Do I need 301 redirects when migrating to Hostinger?
If your URLs stay the same, you may not need new redirects. If URLs change, use 301 redirects from old URLs to the most relevant new pages.
Does Hostinger include SSL after migration?
Yes. Hostinger includes SSL with its hosting plans. After migration, confirm that all important pages load correctly with HTTPS.
What should I check after migrating?
Check SSL, DNS, redirects, forms, images, internal links, sitemap, robots.txt, analytics, Search Console, page speed, and top organic pages.
Can Hostinger migrate WooCommerce websites?
Hostinger supports website migration, including WordPress-based websites. For WooCommerce, test cart, checkout, payment, product pages, and order emails after migration.